How to connect extra fans to Motherboard
Pc usually comes with 1 pre-installed fall, they work fine however if you are a gamer or your work requirements can add pressure to the computer, then you need to know How to connect extra fans to motherboard.
The motherboard functions as a circuit board that links all of your hardware to your CPU delivers power from your power supply and defines the sorts of storage devices, memory modules, and graphics cards (among other expansion cards) that can connect to your PC.
Hence the motherboard is basically responsible to manage all the subsystems of the computer and supplying power to the parts that need it, and its very important for processors, like Intel I9 10th Gen to unlock your PC full potential.
Hence the motherboard is basically responsible to manage all the subsystems of the computer and supplying power to the parts that need it. The motherboard is positioned within the computer case and connects the majority of the elements and computer peripherals. It is the largest circuit board and is positioned either at the left or right of the tower.
There can be multiple circumstances one wishes for plugging in pc fans:
- The work you do can add a lot of pressure to the computer, leading to generating extra heat , for which you must used to the components correctly , you can checkout motherboards for Intel i9 12900k to reach your pc true potential
- The environment you work in is somewhat warm
- To increase airflow and maintain temperatures as low as possible for extremely powerful PCs.
- The fans that originally came with the PC needed to be replaced, due to a voice issue, have generally stopped working, or the quality wasn’t really good. You can check out motherboards for i9 10850k, these motherboards have well build tiny fans to keep the VRM cool , and last longer
- Extra fans can come with more special illuminations for example LED or RGB.
Hence this article will cover the fundamentals of where and how to install extra fans in your case, how to position them correctly, the fundamentals of PC airflow, and how to connect case fans to either your motherboard or power supply.
Where the fans should be installed?
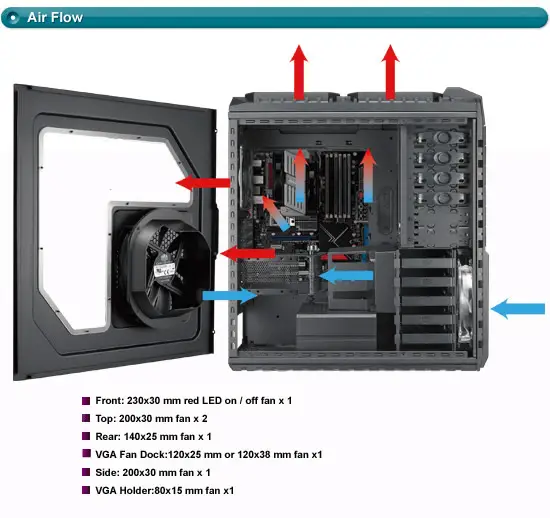
In general, the fans are mainly in front used to pull the air, however, the far that are in the back are supposed to blow it out. The fans that you put if they include top vents, should be utilized as exhaust fans for the hot air that rises. The air is intake by the side-mounted fan which does not have any air filters
The cool air that is outside the case is drawn in through the case’s front by one or more front fans, That cold air is forced through the case, cooling your components, and is subsequently pushed out the back of the case by one or more rear fans also called exhaust fans.
Fans and motherboard?
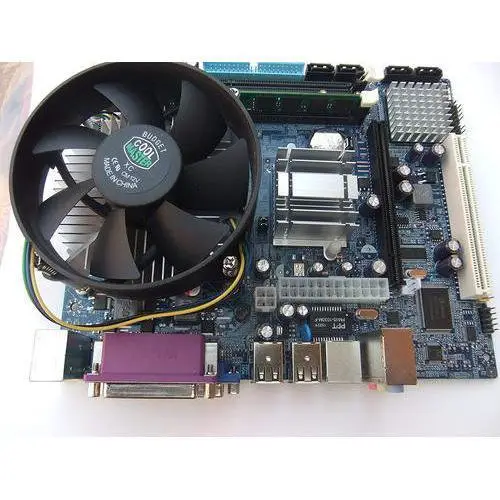
There are different ways to add more fans to the motherboard, mainly you use a Y splitter to connect several fans or you use a fan header/fan hub. However, this is important to remember that most headers are constrained when it comes to providing the electricity they can give. A fan header is normally rated at 1 amp.
It is important to make sure the amperage of the fans since they determine the amount of fans you can run from the motherboard and splitter.
For example, you can only operate two 0.5A fans, although four 0.25A fans would be fine if your fan header is rated at 1 Amp.
One of the ways for larger amp CPU fans is to buy a fan hub motherboard that can grasp power and electricity directly from the power supply unit (PSU), which can help in evading the PC fan headers’ amperage limits.
Fan Headers are connectors on the motherboard into which you attach your many PC cooling fans. There are 3 types of fan headers
- Power fan header: used as the monitor of the Power Supply Unit’s fan. It is important to make sure that the monitoring cable is connected to the power supply for the header to function.
- CPU Fan Header: Used to connect the CPU Fan.
- System Fan Header: Used to connect PC/Case Fans, the most ideal for case fans, splitters, and fan hubs
Usually, the modern motherboards have a 4-pin system header, however, there are 3-pin system headers as well. 4-pin headers utilize a fourth control pin to manage fan speed, allowing any LEDs on the fan to remain unaffected by the fan’s changing speed. 3-pin headers on your motherboard adjust the voltage going to the fan to regulate its speed. To determine how many fan headers your system has, you can do it by reading the manual or checking it physically.
Types of fans for the motherboard?
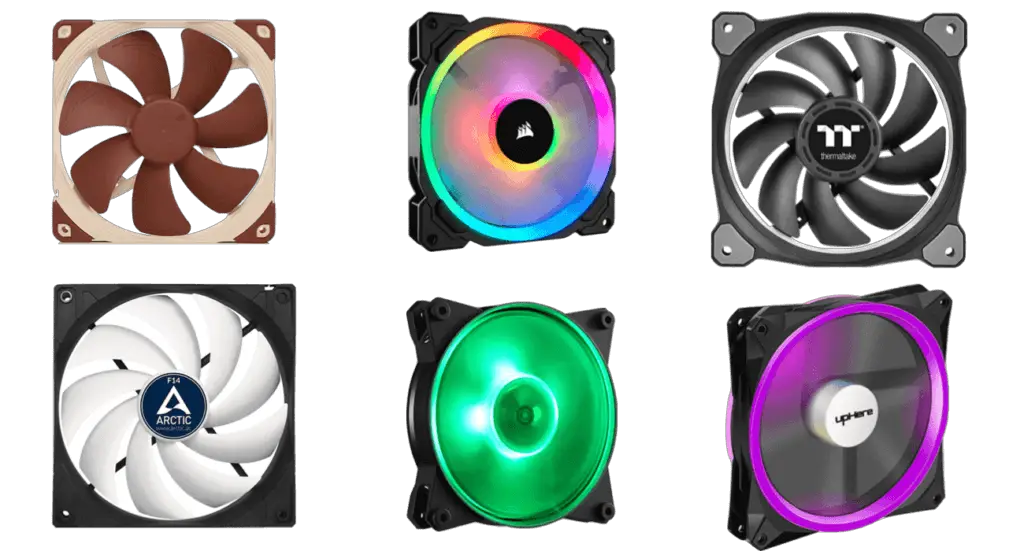
- DC fans: they have are 3 pin ones, and they cater low powered CPU fans
- PMV (pulse width modulation): they are 4 pins ones, they are used mostly due to their speed control and voice diminishing properties
How to plug-in fans to the motherboard?
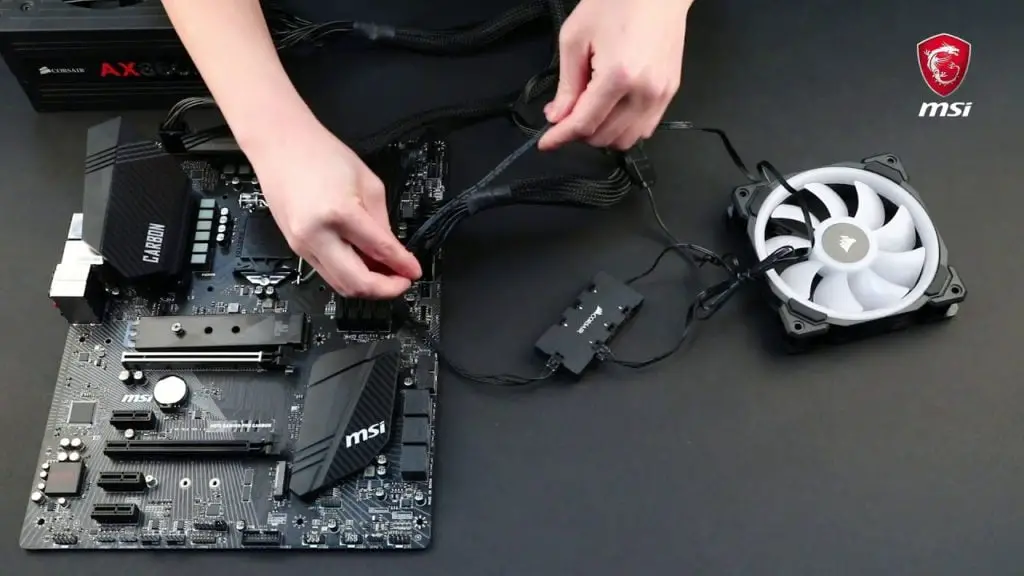
There are 2 ways to connect fan headers on the motherboard:
- Firstly is Using a Y Fan Header Splitter
One of the easiest ways to connect multiple fans to a single fan header is by using a Y fan header splitter, it is also one of the cheapest solutions. The amount of fans that can be installed by a Y fan head splitter is based upon the motherboard header and amperage of the fans, 1 ampere is the average rate of fan header.
Hence it is important to not cross 1 Ampere level for safety and performance reasons.
To set up a Y fan header splitter, you need to attach the female end of the splitter to the motherboard’s fan header. The case fans are attached to the male ends of the splitter.
Splitter costs differ depending on the Y splitter arrangement (2-way, 3-way, 4-way, and so on). The price scales with the number of broken ends. However, in general, they are inexpensive.
All splitters are made to work with both 4-pin PWM and 3-pin DC fans.
- Secondly is using a PC Fan Hub – for more quantity of fans
Adding fans to the pc case can also be done by using pc fan hub, it doesn’t draw power and result in power issues, and can easily be used for connecting fans. One of the best things about PC fan hubs is that they do not restrict themselves to 1 Ampere capacity of the board fan headers.
Using the 15-pin SATA power cords, they take power directly from the Power Supply Unit.
As a result, you may add many high-powered fans without fear of overloading the motherboard fan header.
Fan hubs are quite simple to install One SATA power connection from the PSU is required, as is one 3 or 4 pin connection from the motherboard header to the Fan hub.
The Fan Hub’s female tip links to the motherboard, which further splits into multiple male headers to which you attach Fans.
A Fan Hub can normally attach up to ten fans, which can be either 3 or 4-pin PWM or DC fans.
The PC Fan Hubs are nearly as inexpensive as the fan splitters we examined earlier. They do, however, need an additional power supply connector. It is important to hence ensure that you have an additional SATA connection on hand available.
More costly options include a built-in RGB controller, which RGB fans may want to explore.
How to connect extra fans to Motherboard: Conclusion
Above you can see how to connect extra fans to motherboard, there is another way, and however, it doesn’t involve your motherboard.

